How to Fix an External Drive That Isn’t Showing Up in Windows 10 or 11
Different approaches exist when you want to fix an external hard drive not showing up on your computer. Sometimes, it might be a simple one-step solution like using a different USB port. In other cases, you may need to combine two or more steps to fix the issue. These are some of the most common problems and solutions.
Update Your Drivers
Your Windows machine might not be detecting the external hard drive due to driver issues. You can update them with the following steps:
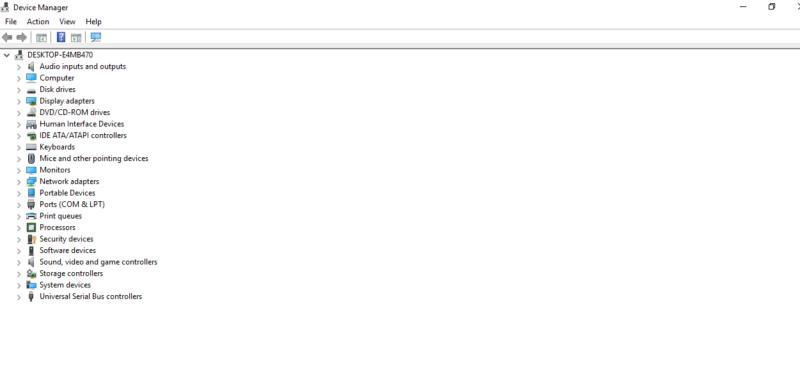
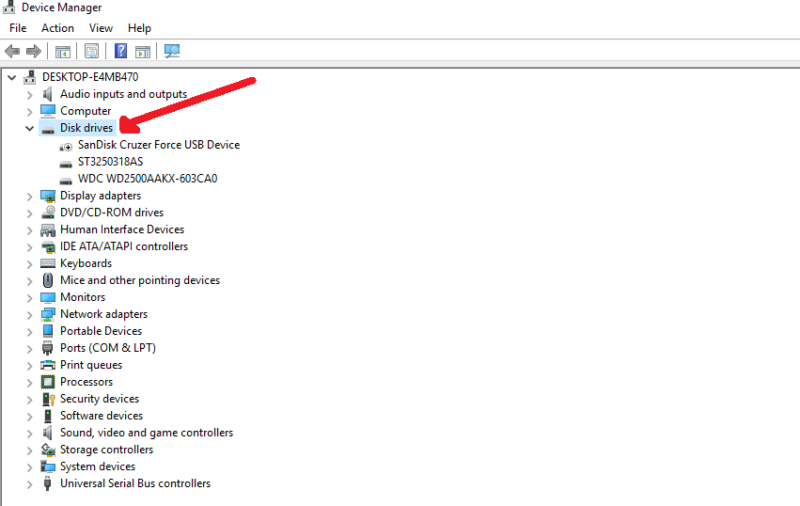
- Open the Device Manager
Hit the “Windows” key and search for the “device manager” tool. Here you’ll see all the devices and components that are connected to your computer.

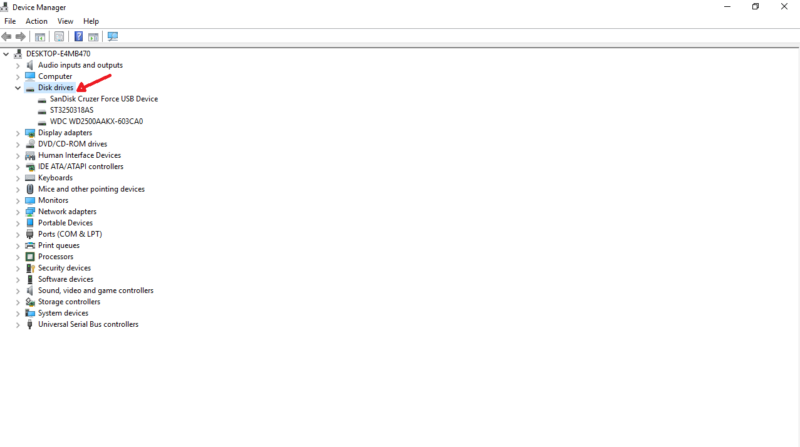
- Open Disk Drives
Locate the “disk drives” section and double-click it to open the available disks.
- Update Drivers
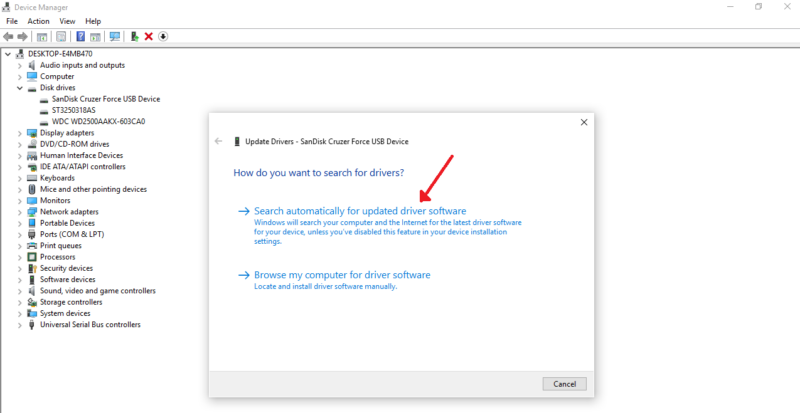
Locate the hard drive you want to update, right-click on it and select “update driver.” For the purposes of this demonstration, we’ll target the first drive. You’ll be given the option to search for new drivers online or manually select them from your computer. Click on “search automatically for updated driver software.”
- Confirm Updates
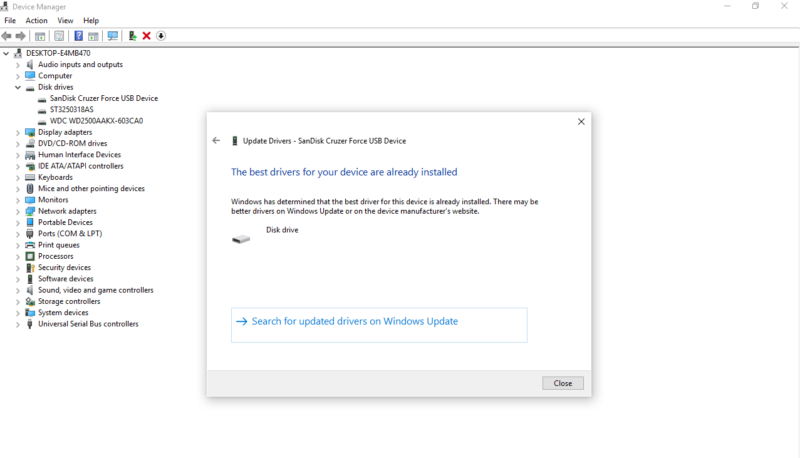
If the driver tab wizard finds new drivers online, it will recommend downloading them. Update them to sort the driver issues and then confirm whether you can see the hard drive on your Windows computer.
Check Your Ports and Power Supply
Your computer may have a defective USB port. You can check if a USB port on your machine is defective by switching from one port to another. If the drive is readable on a different USB port, you’ll know that the former is defective.
If your external hard drive has a power button or needs an external power source, check that it’s plugged in, turned on and indicating that it’s receiving power.
Use the Windows Diagnostic Tool
The Windows operating system comes with troubleshooting tools for solving different issues. These tools can help you diagnose hardware and software issues.
You can use the Windows “disk management” diagnostic tool to manage partitions on your computer. This troubleshooter can help fix issues, such as an external hard drive not appearing on a Windows computer. Follow these steps.
- Open the Dialog Window
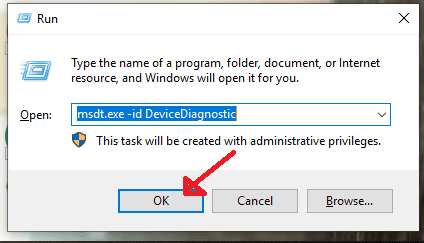
Press the “Windows“ and “R“ keys at the same time to open the “run” dialog window. Type “msdt.exe -id DeviceDiagnostic” and click “OK” or press the “enter” key.
- Press “Next” on the Dialog Box
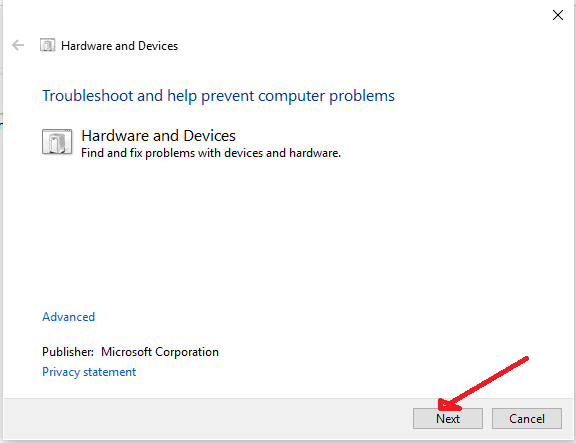
The computer will ask if you want to troubleshoot the hardware and devices that are connected. Click the “next” button.
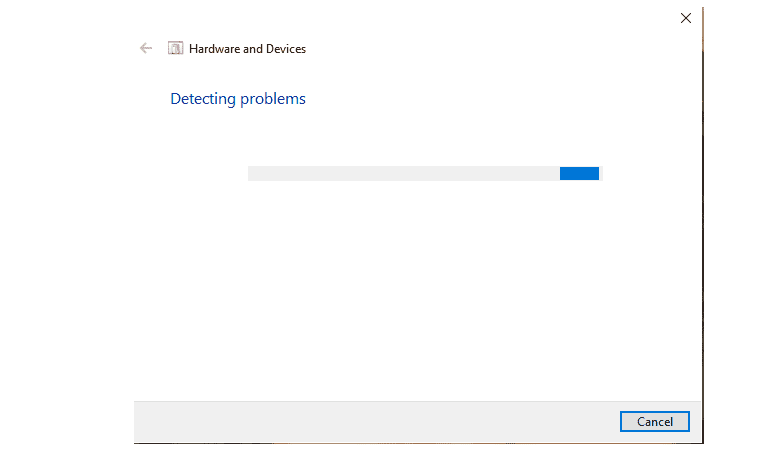
- Fix Problems
The troubleshooter will run a diagnostic test of your machine and any connected drives to check for problems. It will run for a few seconds and display any issues that it can find with your drives.
Add or Change the Drive Letter
Windows identifies the various drives in your computer using letters. By default, the partition carrying the operating system is labeled C. Your computer might have one partition or several, depending on your needs.
When you mount an external hard drive, it will appear alongside other partitions of your internal hard drive. However, if your external hard drive’s letter conflicts with that of another computer drive, the external drive won’t appear on the File Explorer. Instead, it will show up as a “new volume” in the disk management space.
Normally, your computer assigns a letter to all of its internal drives by default. Thus, if the system somehow assigned your external hard drive with a similar drive letter, you can make the external drive discoverable by giving it a new one.
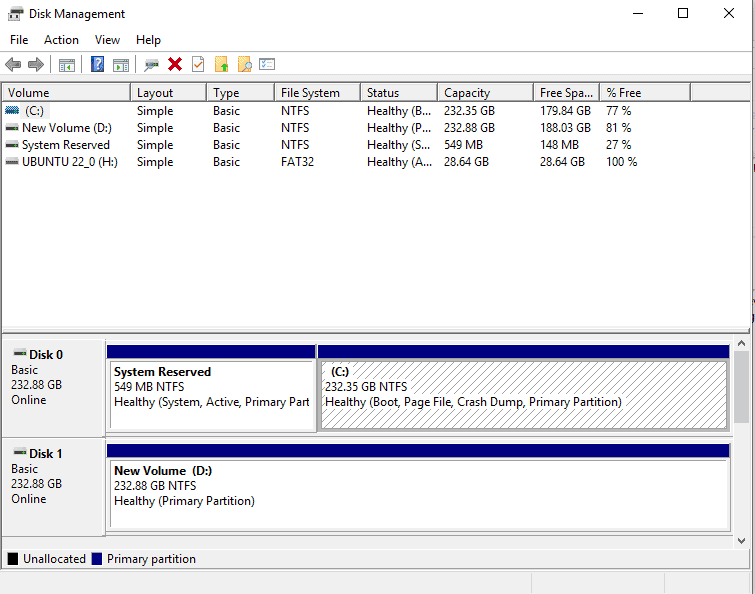
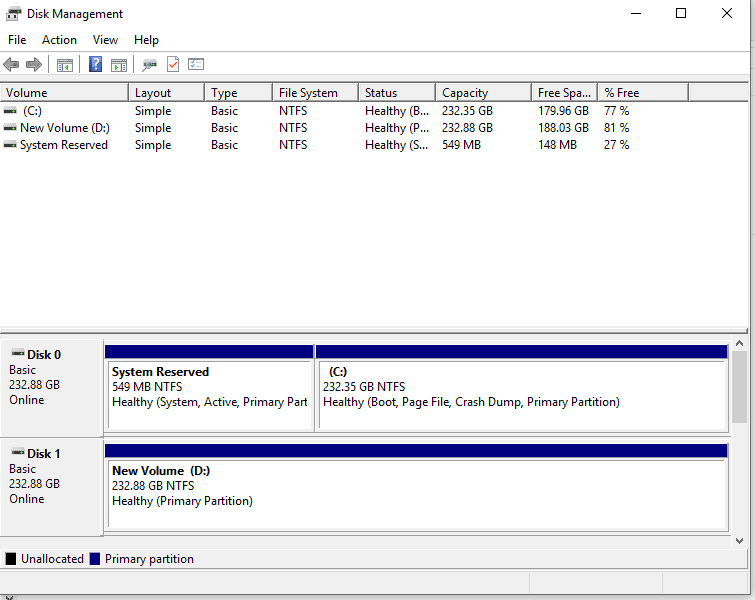
- Access the Disk Manager
Right-click the “start” button on the Windows taskbar. Select “disk management” to see an overview of your drives and partitions. Your drives might have letters that differ from what you see here.
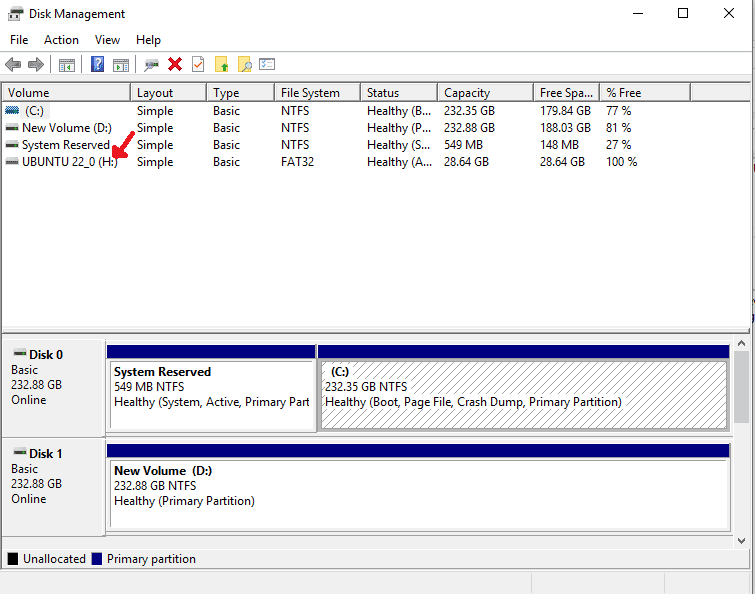
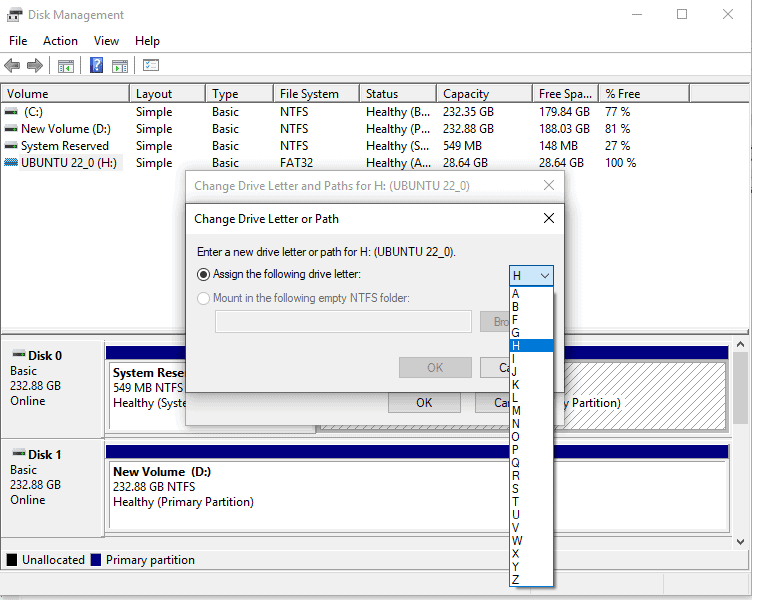
- Access Drive Letter and Paths
Select the drive you want to rename, right-click it and select “change drive letter and paths.” The target disk in this demonstration is drive H.
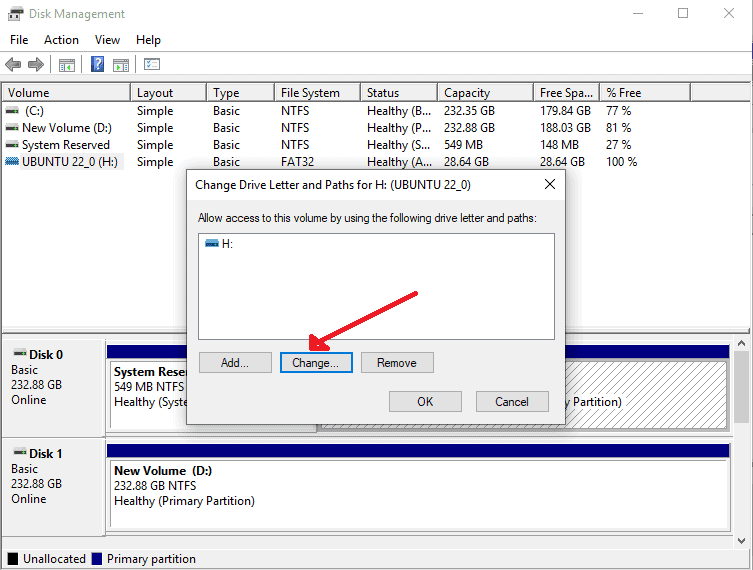
- Change Drive Letter and Paths
You can either add or change the existing drive letter. The first option will work if your disk doesn’t have a name. You can also change the drive letter just in case the problem stems from a conflict with another drive or partition.
- Save Changes
Select “assign the following drive letter” and choose a letter for your drive from the dropdown menu.
Initialize the Hard Drive in the Device Manager
Your Windows 10/11 computer might fail to recognize a new hard drive because it’s not initialized. However, you can only initialize a disk that isn’t formatted yet.
If your disk already contains some useful files, don’t initialize it, as you will lose all of them. If you already have files, the best approach is to troubleshoot the issue. Initializing the disk prepares it for use by Windows so that you can format and store files in it. You can use the steps below to initialize it.
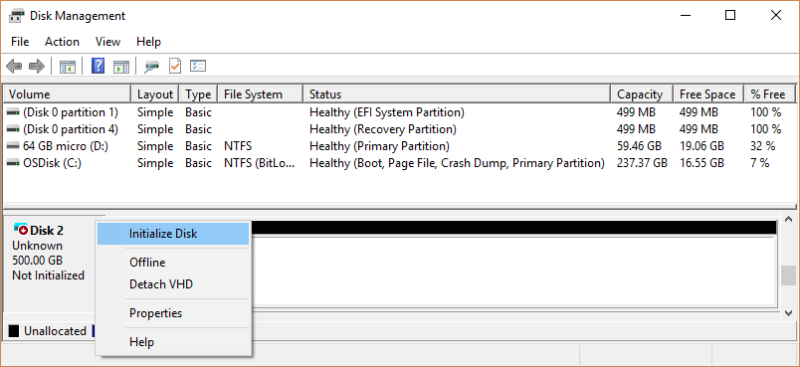
- Open Disk Management
Right-click the “Windows” or “start” icon on your computer and search for “disk management.” You will see all the drives (both internal and external) listed here.
- Initialize the Drive
Right-click on the target drive and click “initialize disk.” If the disk is listed as “offline,” first right-click on it and select “online.” Follow the prompts on the “initialize disk” dialog box and select your partitioning style as either GPT or MBR.
However, some USB drives don’t have the initialize option. If that’s the case with your drive, the only option left is formatting and assigning the drive with a new letter.
Uninstall & Reinstall the Hard Drive in the Device Manager
Although the first step was updating the drivers, sometimes Windows can’t find any new drivers to download, or the old driver gets in the way. To solve this, you can uninstall and reinstall the hard drive. Use these steps to uninstall and reinstall the hard drive.
- Open the Device Manager
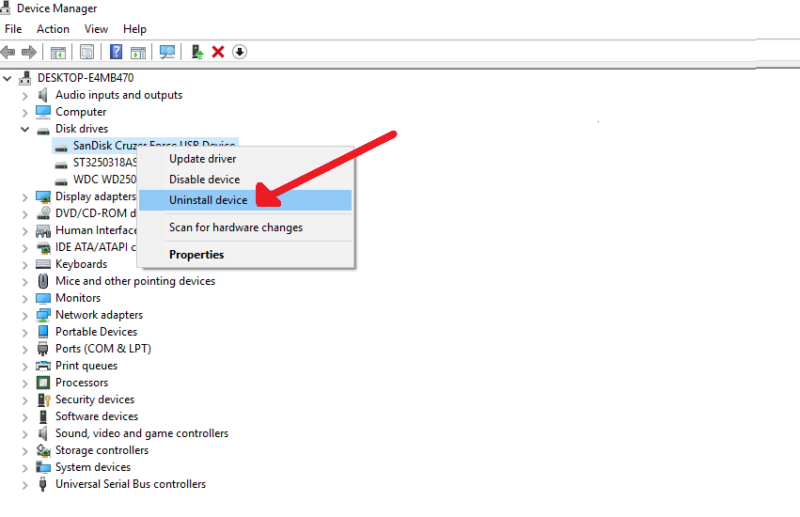
Right-click the “Windows” icon on your computer and click on “device manager.” Scroll down to “disk drives” and click the expand button to list all the drives.
- Uninstall the Hard Drive, then Reinsert
Right-click the target drive and select “uninstall device.” You will get a warning. Click “uninstall” and let the process finish. Remove and reinsert the hard drive. In most cases, your computer will install the external drive automatically. If not, you can follow the installation wizard that appears on your screen. You can now remove and reinsert the drive to your computer’s hard drive port. A Windows computer will automatically reinstall most external hard drive models the moment you connect it.
Format the External Drive
If none of these approaches worked, the only remaining option is to format the external disk. However, you must be aware that formatting erases all the data on your disk and restores it to its original state.
You can use the approach explained above to access the external hard drive through the “disk management” function by right-clicking the drive and selecting “format.” Alternatively, you can use third-party tools to format the external drive.